
Whenever I’m going to teach something new I first try to round up friends to be guinea pigs. That is to say, give them the chance to take advantage of a special opportunity – get a free jewelry making class and come out with a piece they probably never thought they could make. That sounds much better, doesn't it? I discovered long ago that there are always surprises when you start teaching a topic and everything goes more smoothly when I’m aware of common problem areas before “official” classes begin.
This fall I’ll be teaching a fold forming class so I’ve been gathering willing, and a few not-so-willing subjects. (What is fold forming? See the previous blog entry.) One was the husband. I’d have to put him in the not-so-willing category but he finally succumbed to my sighing and gamely created a work of art that surprised both of us. We're not sure where it is now or it would be included here... The only two I’ve convinced since I started this web site are my sister Danni and the husband’s old Albion College chum, Larry Downs. The only one I remembered to take pictures of in the studio was Larry – so may I proudly introduce AuSable Designs August Student of The Month: Larry Downs of Coldwater Michigan (pictured above).
This fall I’ll be teaching a fold forming class so I’ve been gathering willing, and a few not-so-willing subjects. (What is fold forming? See the previous blog entry.) One was the husband. I’d have to put him in the not-so-willing category but he finally succumbed to my sighing and gamely created a work of art that surprised both of us. We're not sure where it is now or it would be included here... The only two I’ve convinced since I started this web site are my sister Danni and the husband’s old Albion College chum, Larry Downs. The only one I remembered to take pictures of in the studio was Larry – so may I proudly introduce AuSable Designs August Student of The Month: Larry Downs of Coldwater Michigan (pictured above).

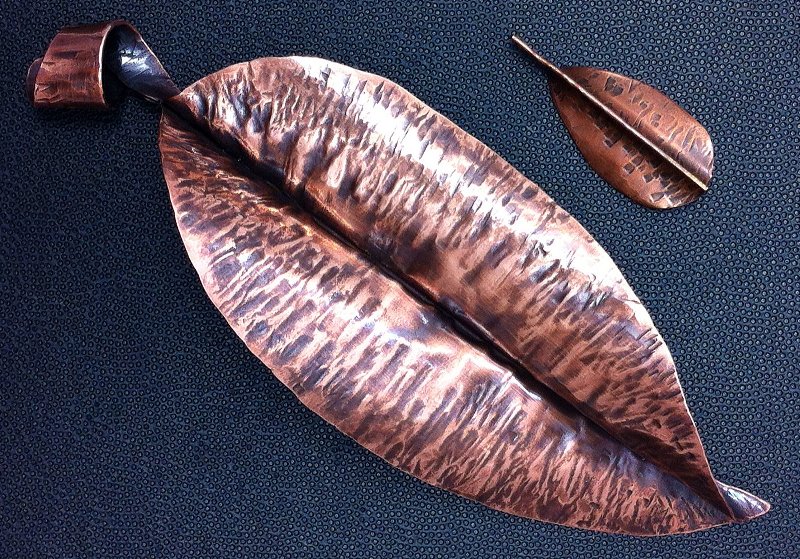
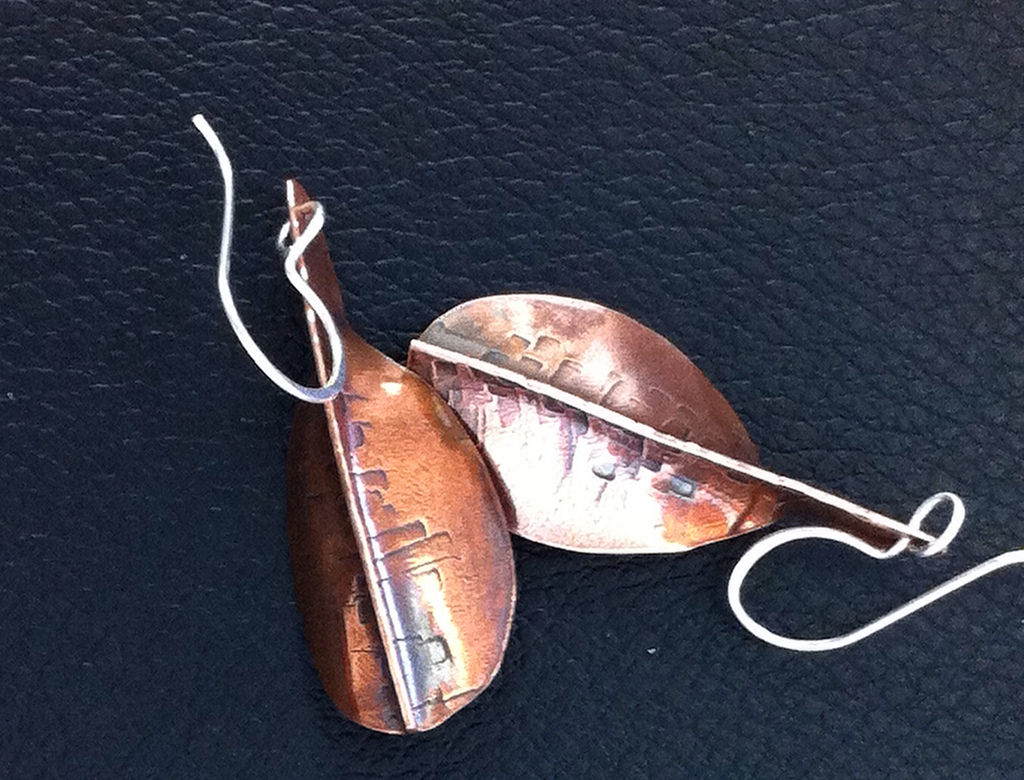
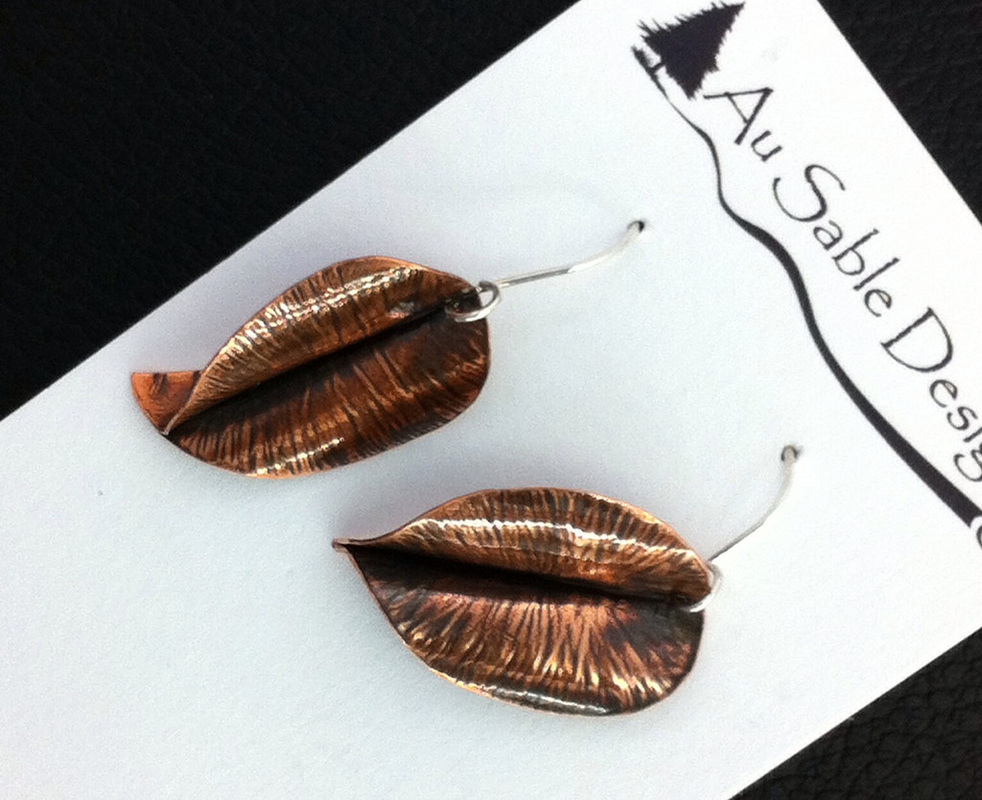
I knew Larry was a handy fellow with an artistic eye and it wasn't too hard to talk him into trying to create a pair of fold formed leaf earrings for his lovely bride (of many years) Judy. I assured him I would happily finish whatever he didn't want to, and he’d still get the special gift for Judy along with major husband Brownie points. What's not to like? Turns out I didn't need to finish anything.
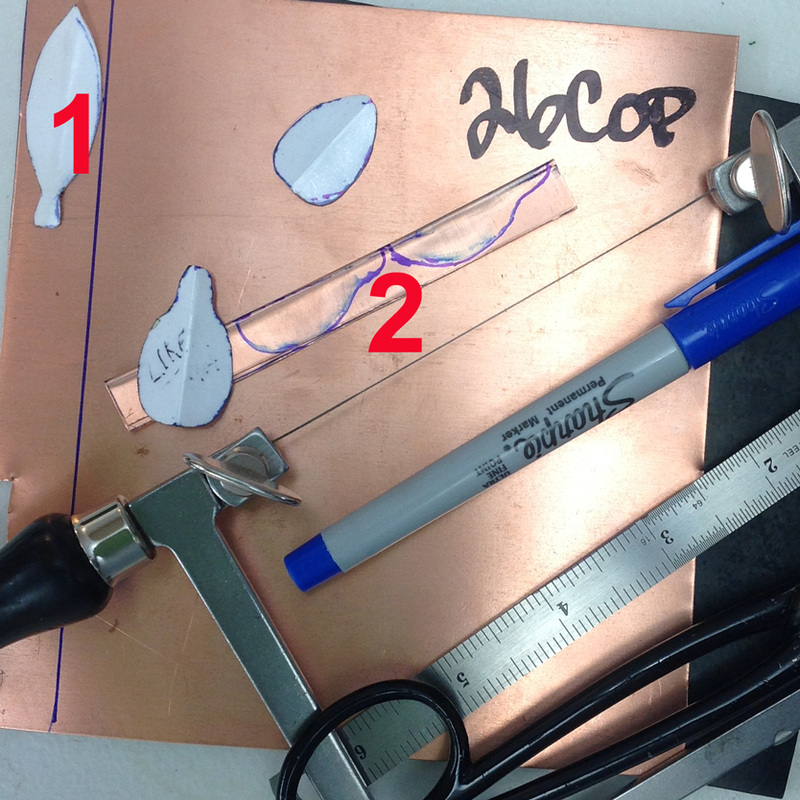
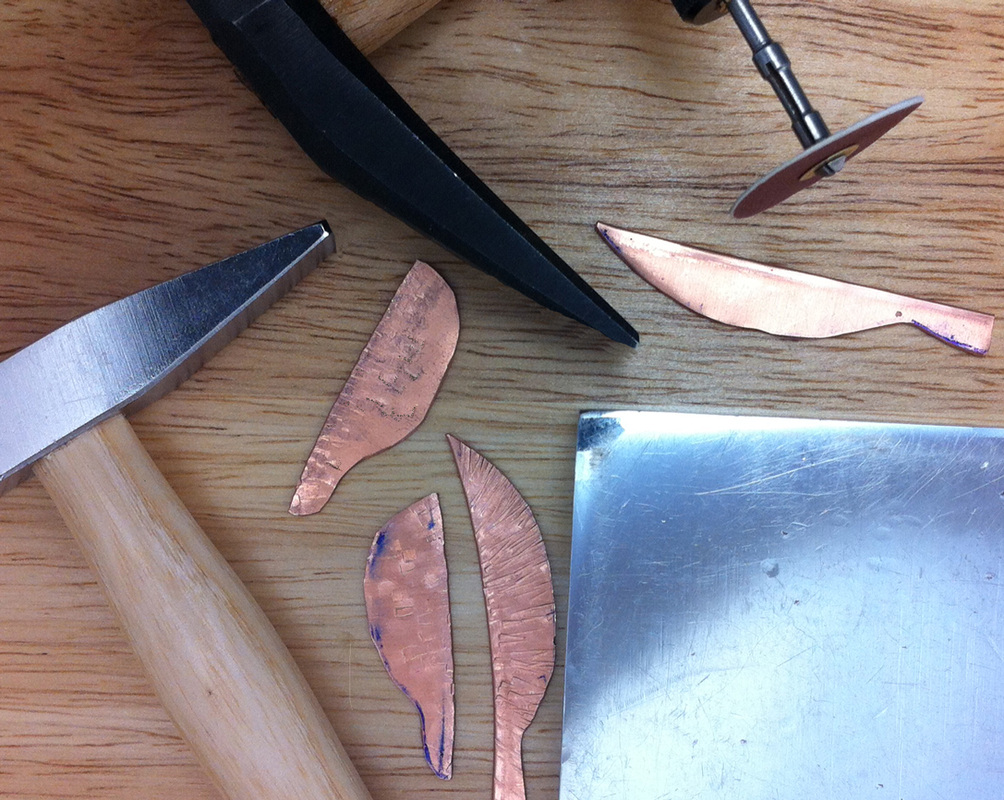
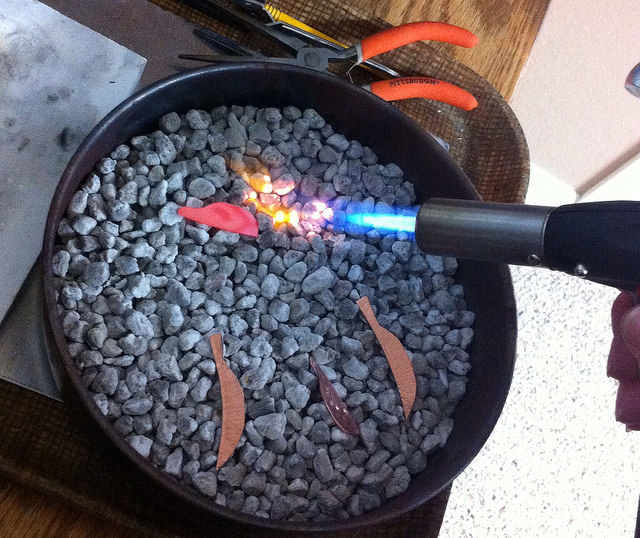
I've always felt an important part of teaching is figuring out how much guidance your student needs. Some are nervous and want step by step support. Others not so much. I quickly learned Larry was at the extreme end of “not so much.” I might have to make a new category of “show me only what you absolutely HAVE to then get out of my way.” No matter how quickly I tried to demonstrate, it seemed his hand was reaching for the tool before I was done. I found it best to keep myself busy in another part of the studio rather than hover. If I saw a problem developing I tried to move in and out with explanations ASAP so he could get back to his own pace. He did every step of the process from cutting out the copper sheet shapes to making his own sterling ear wires and applying multiple coats of Renaissance wax sealer in the final steps. Here they are. Who knows, this could be spoken about, in years to come, as the week that Larry Downs first learned he liked to move metal.
I've always felt an important part of teaching is figuring out how much guidance your student needs. Some are nervous and want step by step support. Others not so much. I quickly learned Larry was at the extreme end of “not so much.” I might have to make a new category of “show me only what you absolutely HAVE to then get out of my way.” No matter how quickly I tried to demonstrate, it seemed his hand was reaching for the tool before I was done. I found it best to keep myself busy in another part of the studio rather than hover. If I saw a problem developing I tried to move in and out with explanations ASAP so he could get back to his own pace. He did every step of the process from cutting out the copper sheet shapes to making his own sterling ear wires and applying multiple coats of Renaissance wax sealer in the final steps. Here they are. Who knows, this could be spoken about, in years to come, as the week that Larry Downs first learned he liked to move metal.

His visit ended with a wonderful dinner of fresh grilled king salmon that the husband prepared while we metal smiths toiled in the studio. The guy is a gem. Have I mentioned what a talented cook he is? My mother used to loudly kiss her pinched fingers and shake them at you exclaiming with an Italian accent (No, we’re Irish, not Italian. Not sure how that started but the accent and hand gesture had a recurring guest role on Mother's life show. It was probably an East Coast thing.), “My son-in-law, the gourmet chef!”

But I digress ... again. Larry caught the salmon earlier in the day jigging on Betsie Bay (just off Lake Michigan at Frankfort) with the husband. Nice fish, nice earrings, nice dinner, and nice end to a 3-day fishing trip visiting with his old college pal. Not a bad day for Downs.

 RSS Feed
